April 22, 2026
Best Practices for Collaborative Prototyping
-
Visual Soldiers
- UX/UI Design
- minute read

Best Practices for Collaborative Prototyping
Collaborative prototyping transforms how teams design and develop products by involving everyone – designers, developers, and stakeholders – from the start. This approach reduces miscommunication, speeds up timelines, and ensures user needs are met early. Key takeaways include:
- Cross-functional teamwork: Everyone contributes to building interactive prototypes, creating a shared source of truth.
- Faster feedback cycles: Issues are identified early, cutting post-launch fixes by 32% and saving weeks of development time.
- Clear objectives: Setting SMART goals ensures focus and reduces wasted effort.
- Right tools: Platforms like Figma, Miro, and UXPin simplify collaboration with features like real-time editing, version control, and contextual feedback.
- Accessibility integration: Prioritizing accessibility from the start avoids costly fixes and improves usability for all users.
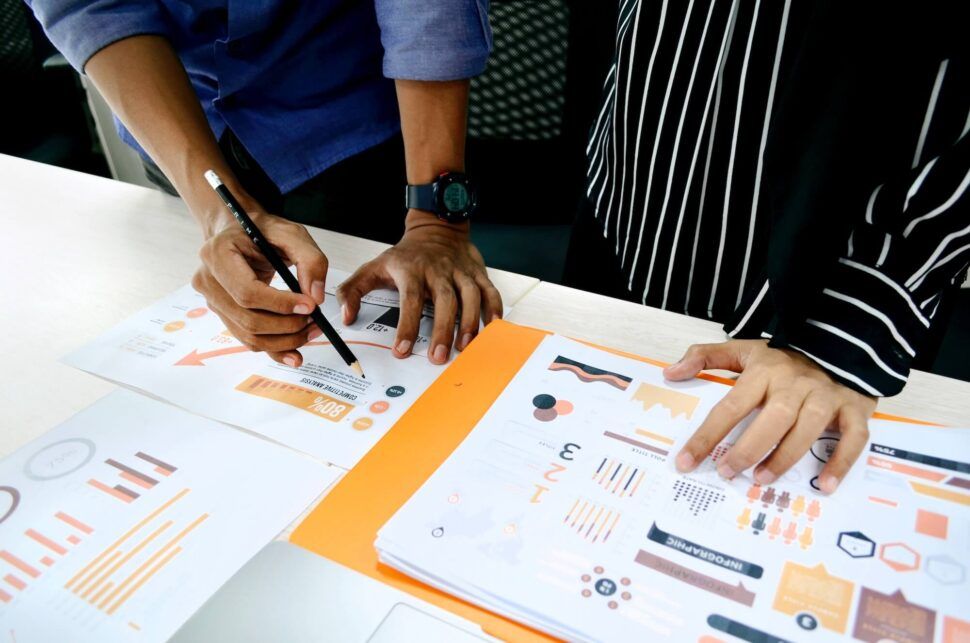
Product, engineering, design A guide to effective collaboration
Setting Objectives and Starting Early
Before diving into prototyping, the team needs to answer a critical question: What problem are we solving? Without this clarity, the process can quickly veer off course – designers might chase aesthetic perfection, developers could get bogged down in edge cases, and stakeholders might request features that don’t address real user needs. Clear objectives serve as a unifying guide, ensuring that everyone stays focused on what truly matters. This focus creates a strong foundation for setting actionable design goals.
The data supports this approach. Teams with clearly defined objectives report 30% faster decision-making during prototyping. Additionally, prototypes built with clear goals receive 25% more relevant feedback, as reviewers know exactly what they’re evaluating. Integrating user insights early in the process can also cut project risks by up to 50%.
Define Clear Prototyping Objectives
Setting clear goals starts with using SMART criteria – goals should be Specific, Measurable, Achievable, Relevant, and Time-bound. This approach keeps the project on track, minimizes scope creep, and ensures resources are allocated effectively. For example, instead of vaguely aiming to “improve the checkout flow”, a SMART goal would be: “reduce task completion time by 15 seconds within one month”.
Focus on key user flows rather than attempting to prototype every aspect of the product. Identify 4–5 critical moments in the user journey that carry the most risk or offer the greatest potential value. When cross-functional teams align on these shared objectives early, they avoid common pitfalls like miscommunication during handoffs.
Documenting design choices as you go is equally important. J. Bellis from Elsevier highlighted that interactive prototyping helped their team address long-standing issues with defining requirements. He noted, “Requirements definition has always been a problem in software, and making it come to light with interactive prototyping really made a difference to a lot of people”. Capturing the reasoning behind decisions ensures alignment across iterations and provides valuable context for future team members.
| Objective Type | Example Goal | Target Metric |
|---|---|---|
| User Engagement | Increase average session time | 20% increase in 3 months |
| Usability | Reduce task completion time | 15-second reduction in 1 month |
| Market Fit | Align with user preferences | 80% of testers express interest |
Once these objectives are defined, starting prototypes early can further accelerate progress and strengthen collaboration.
Start Prototyping Early in the Design Cycle
Prototyping early in the process not only saves time but also reduces risks. Waiting for designs to be “perfect” before creating a prototype is inefficient. Catching and addressing design flaws early can reduce correction costs by up to 10 times compared to fixing issues later in development.
Early prototyping also fosters collaboration across departments. Instead of designers working in isolation, product managers, developers, and marketers can contribute ideas from the start. This inclusive approach often leads to more well-rounded solutions.
Start with basic wireframes or sketches that emphasize core functionality over visual details. To keep the team aligned, use a Kanban board with columns like “To Do”, “Doing”, and “Done” to track progress. Before building begins, have a facilitator review the user journey to ensure everyone shares the same understanding. A small time investment upfront can prevent hours of rework later.
Choosing the Right Collaboration Tools
Once you’ve defined your goals and started prototyping, the next step is finding the right collaboration tools. Using tools designed for team collaboration can eliminate common hurdles like delayed file sharing and version mix-ups.
Features to Look for in Collaboration Tools
One must-have feature is real-time multi-user editing. Think of it as “multiplayer mode” for your designs – your team can work on the same file at the same time, allowing immediate feedback from all sides. For example, a developer can flag a technical issue while a designer is still refining the layout, saving time and avoiding headaches later in production stages.
Another important feature is contextual feedback systems. Tools that support on-page comments with threaded discussions make feedback clear and actionable. You can tag teammates and attach comments directly to specific design elements, cutting down on endless email chains. Plus, status tracking (like marking comments as open, in-progress, or resolved) ensures everyone knows what still needs attention.
Lastly, version control and history are essential for safeguarding your work. With features like branching and merging, designers can experiment freely without worrying about disrupting the main project. And if something goes wrong, a detailed change history lets you roll back to earlier versions. These capabilities not only improve workflow but also strengthen the collaborative foundation you’ve already built.
With these features in mind, here are some tools that stand out for their collaborative prototyping capabilities.
Recommended Tools for Collaborative Prototyping
Figma is a standout tool, earning a 4.7/5 rating on platforms like G2 and Capterra. Its Dev Mode simplifies the design-to-development process by allowing developers to pull CSS, assets, and specs directly from the designs. Pricing starts at $12–$15 per editor per month, with a free tier for smaller teams. Diana Mounter, Head of Design at GitHub, sums it up well:
“Nearly everything that designers and developers need is available in Figma”.
For teams focused on brainstorming and early-stage planning, Miro is a great option. Its infinite canvas is perfect for mapping user journeys and generating ideas. With a 4.7/5 rating, Miro’s starter plans begin at $8 per member per month. Victoria Lamppa, Design Lead at Scandinavian Airlines, shared her experience:
“I did a competitive benchmark in 30 minutes with Miro Prototyping, which would have taken me 2 hours”.
Visily is ideal for teams where non-designers need to contribute. It uses natural language processing to help create wireframes and offers a free tier for teams. One media startup even reported a 40% reduction in design-to-development handoff time after adopting a collaborative prototyping tool.
If your team is working on live products, Alloy might be the right fit. This tool captures live web pages through a Chrome extension and allows you to make edits using AI prompts – all while staying aligned with your design system. For advanced interactivity, UXPin is worth exploring. Its Merge technology syncs with Git, Storybook, or npm, enabling you to prototype with real code components.

Building Effective Team Dynamics
Once you’ve chosen the right collaboration tools, the success of a project depends on how well team roles are defined and how effectively the team communicates. Even the best tools won’t help if roles are unclear or communication is disorganized. Strong team dynamics hinge on clearly assigned roles and structured communication methods to keep everyone aligned.
Defining Roles and Responsibilities
In a typical collaborative prototyping team, you’ll find Designers (responsible for visuals and user flows), Developers (focused on feasibility and technical constraints), and Stakeholders or Product Owners (who set business goals and priorities). Beyond these essential roles, it’s helpful to assign a Facilitator to oversee the process, a Decider to break ties, and a Stitcher to organize assets and ensure the prototype is accurate.
Using a RACI matrix can clarify ownership of tasks. For instance, a designer might be Responsible for wireframes, while a stakeholder is Accountable for approving them, and developers are Consulted for technical input. This system avoids duplication of work and ensures every task is accounted for.
Once roles are clear, the next step is setting up communication protocols to turn strategy into actionable steps.
Establishing Communication Protocols
Centralize feedback by using tools that allow contextual comments directly within the prototyping platform, such as Figma or UXPin, for design-specific input. Broader discussions can take place in tools like Slack or Teams. This approach keeps feedback organized and prevents it from getting lost in email threads or scattered across platforms.
Kanban boards are a great way to track progress. Simple columns like To-Do, Doing, and Done give everyone visibility into the team’s workflow and allow members to pick high-priority tasks. Pair this with comment status tracking – marking feedback as “Open”, “In Progress”, or “Resolved” – so everyone knows what still needs attention. For asynchronous reviews, recorded walkthroughs can highlight specific interactions, giving stakeholders the flexibility to review on their own time.
When teams combine clear roles with strong communication practices, they not only improve collaboration but also achieve better results. Teams using collaborative prototyping tools report shipping features about 6 weeks faster than those relying on traditional workflows, with a 32% decrease in post-launch fixes. The key is to establish these systems early and stick to them consistently.

Iterating and Refining Prototypes
Once your team dynamics are in place, it’s time to focus on refining prototypes. This isn’t a one-and-done process – it’s a cycle of testing, learning, and improving. Each iteration transforms assumptions into real insights, gradually shaping prototypes into designs ready for production. And the results speak for themselves: iterative design can boost user satisfaction by over 30%, while 60% of developers report that incorporating user feedback enhances product quality.
Conducting Iterative Feedback Sessions
Clear team roles are just the starting point; structured feedback sessions are what truly drive meaningful improvements. Without structure, feedback can easily turn into vague opinions or unproductive debates. To keep things actionable, tools like the Feedback Capture Grid (categorizing input into Likes, Criticisms, Questions, and Ideas) or the “I Like, I Wish, What If” method can help. The Grid is particularly useful for handling large amounts of feedback, while “I Like, I Wish, What If” encourages constructive input, even from participants who may be less experienced at giving feedback.
When testing prototypes, include a mix of representative, extreme, and internal users. Aim for 5–10 representative users for general insights, and 10–15 participants for deeper qualitative feedback. During these sessions, stay neutral – don’t defend your design or try to sell the idea. Instead, ask users to “think aloud” as they interact with the prototype. This approach reveals their thought processes and highlights areas of confusion.
“When the entire team participates in prototype creation, implementation questions surface early rather than appearing during development.” – Craig Douglas, Visily
Organize feedback by severity using a tagging system: “Critical” for issues that block task completion, “Major” for significant difficulties, and “Minor” for minor friction. This ensures your team addresses the most pressing problems first. For distributed teams, use your prototyping tool’s contextual commenting features. Attaching notes directly to specific UI elements keeps feedback organized and avoids losing key insights in endless email chains.
With a solid feedback process in place, it’s time to find the balance between creative exploration and practical constraints.
Balancing Creativity and Feasibility
Striking the right balance between creativity and technical practicality is essential. A common pitfall is involving engineers too late in the process, leading to designs that look fantastic but are impractical to manufacture or code.
“Missing input from engineers and manufacturing partners until late stages produces designs that look great but can’t be manufactured economically.” – Sophia Silver, Product Marketing Manager, Vizcom
To avoid this, adopt a multi-fidelity strategy. Use low-fidelity wireframes to test big-picture ideas like value propositions and interaction flows. Save high-fidelity prototypes for validating technical feasibility or functional details. This way, you won’t waste time perfecting concepts that might not work in practice.
Version control is another valuable tool – branch off creative ideas without disrupting the main design flow. If a direction doesn’t pan out, document the decision briefly to avoid revisiting the same dead-end later. Real-time collaboration tools can also help. For example, scheduling “prototype jams” where designers and developers work together in real-time can resolve technical blockers on the spot. One product manager shared that their team cut design-to-development handoff time by 40% after switching to collaborative prototyping tools.
Set clear success criteria for every iteration. Whether you’re solving an ergonomic issue or testing a technical approach, having defined goals ensures changes are purposeful and not just for the sake of change. Treat iteration as a disciplined and goal-oriented process, not just trial and error.
Integrating Accessibility into Prototyping
Accessibility isn’t just a design add-on – it’s a core principle that should guide prototypes from the outset. With around 15% of the global population living with a disability, prioritizing accessibility is both ethically responsible and a smart business move. Addressing accessibility early in the design process not only helps avoid costly fixes later but also reduces the risk of legal challenges under regulations like the Americans with Disabilities Act (ADA) and the Web Content Accessibility Guidelines (WCAG). Plus, accessibility features – like closed captions or keyboard navigation – often improve usability for everyone. Let’s dive into some best practices for integrating accessibility into prototypes.
Accessibility Best Practices for Prototypes
Start with the POUR principles: Perceivability, Operability, Understandability, and Robustness. This means your prototype should:
- Present information in formats everyone can perceive (e.g., use alt text for images and ensure proper color contrast).
- Allow navigation through various methods, particularly via keyboard.
- Communicate information clearly.
- Work seamlessly with assistive tools like screen readers.
Keyboard navigation is a must. Every interactive element should be accessible with the Tab key, and the tab order should follow a logical sequence. Include visual focus indicators to show users where they are on the page, and use OnFocus events to provide additional clarity. Embedding these practices early sets the tone for inclusive design across your team.
Color contrast is another critical element. Ensuring WCAG-compliant contrast ratios guarantees readability for users with visual impairments or color blindness. Jennifer Sutton, Owner of JSutton Media, offers a practical tip:
“Take your most skeptical stakeholder out for coffee on a sunny day… pull out your phone and load up your design. Even with the brightness on your device turned all the way up, chances are that a design with inadequate contrast will be darned hard to read in full sun.”
This simple “sunlight test” underscores the importance of high-contrast designs.
To make your prototype screen reader-friendly, use semantic markup, ARIA labels, and alternative text. Document these attributes to ensure accessibility features are preserved during handoff. A clear heading hierarchy also helps screen reader users navigate content efficiently.
Dynamic content should always be user-controlled. For example, provide stop or pause buttons for auto-playing carousels or sliders, and allow users to extend time limits on timed tasks. Forms should include accessible validation with clear labels and inline error messages. When errors occur, focus should automatically shift to the alert or the first invalid field.
Testing for Accessibility During Collaboration
After incorporating these practices, thorough testing is essential to ensure everything works as intended. Use a combination of automated tools, manual keyboard tests, and user feedback from people with disabilities to validate accessibility.
Automated tools like WAVE can flag obvious issues like missing alt text or poor contrast. However, these tools can’t evaluate whether interaction flows are intuitive or content is easy to understand. That’s why real user feedback is invaluable. Involve participants with a range of disabilities – visual, auditory, cognitive, or motor impairments – early in the prototyping phase to gain authentic insights. As FasterCapital emphasizes:
“Accessibility testing is not only a legal requirement, but also a moral obligation for designers and developers who want to create products that are inclusive and accessible for all users.”
Use screen readers like VoiceOver (Mac), JAWS, or NVDA (Windows) to test your prototypes. Many design tools, such as Figma, offer accessibility features that convert designs into semantic HTML, helping screen readers interpret elements like buttons, links, and lists correctly. Encourage stakeholders to test prototypes on their own devices using built-in assistive technologies – this fosters empathy and leads to better design decisions.
Publish your prototype on a web-based platform and run it through online HTML accessibility checkers to catch technical gaps. Check that interactive elements work with keyboard navigation, focus indicators are visible, and form errors are announced properly. Document your findings and address critical issues – those that prevent users from completing tasks – before moving forward.


Moving from Prototype to Production
Once your prototype has been fine-tuned through feedback, the next challenge is turning it into a production-ready design. This transition can be tricky, even for the best designs. Did you know that clear specifications can cut development time by 40%, and a smooth handoff process can reduce back-and-forth iterations by 60%?. The key to success lies in approaching the handoff as more than just sharing files – it’s about creating an ongoing dialogue that ensures everyone understands how the design works. This approach lays the groundwork for effective collaboration with developers.
Collaborating with Developers
Getting developers involved early is essential. They can help identify technical limitations, API dependencies, and data structure needs before you lock in your design. This proactive step saves you from costly redesigns later when technical issues arise.
Another critical task is documenting the logic behind your prototype. This includes detailing how interactions behave under various conditions. For instance, what happens if the API fails? Or if a user has no saved data? Or when the network times out? A great example of this is Moladin, an Indonesian automotive marketplace. In 2021, under Chief Product Officer Praz Perkasa, the team used Miro to document their product’s logic layer. By mapping out complete workflows and logic points, they doubled their story points per sprint and maintained zero critical bugs in post-release deployments over two years. As Perkasa explained:
“Miro has become the backbone of our product development process. Everyone now has a clear view of how their work connects to the bigger picture”.
Walkthrough meetings are another must. Use these sessions to showcase prototypes and explain the reasoning behind design choices. Annotate your designs thoroughly – not just labeling elements but explaining their behavior. For example, instead of simply naming a button color, describe its function: “Button disabled until form validation passes; triggers POST request to /api/checkout”. This level of clarity can cut the need for handoff fixes by over 50%.
Ensuring Production-Ready Designs
After collaborating with developers, your designs should be ready for any scenario – not just ideal ones. This means documenting all possible application states: loading, error, empty, and success. Responsive behavior should also be defined with fluid layouts and constraints, not just static mockups.
A single source of truth is crucial. Use design systems with shared tokens, components, and consistent naming conventions to ensure what’s designed in tools like Figma matches what’s built in code. Before handing off your files, clean them up – remove unused layers, group elements logically, and use proper versioning (no more “Final_v3_REALLY_FINAL”).
To ensure nothing gets missed, create a checklist. Include items like responsive breakpoints, accessibility (WCAG compliance), animation timings, and component mappings. Once development is complete, conduct a design QA audit to compare the live build with your prototype. This helps catch inconsistencies in spacing, typography, and interactions. As Jake Albaugh, Developer Advocate at Figma, aptly puts it:
“Design is ‘what we want’ and development is essentially ‘what we have'”.
Your role is to bridge this gap with precision and clear communication.
Conclusion
Collaborative prototyping transforms product development by bringing transparency and alignment to cross-functional teams. When developers, product managers, and stakeholders are involved from the very beginning, it fosters shared ownership and reduces the risk of unexpected setbacks. In fact, teams using collaborative prototyping tools deliver features six weeks faster and deal with 32% fewer post-launch fixes.
Real-time collaboration creates a unified source of truth, ensuring every design decision is visible and misunderstandings are minimized. As Douglas Ferguson, President of Voltage Control, explains:
“This approach unleashes the entire Design Sprint team and supports everyone contributing in an efficient and productive manner”.
By making the prototype the central hub for teamwork, potential issues can often be resolved in minutes rather than days. This collaborative mindset encourages ongoing refinement and seamless adjustments throughout the project lifecycle.
Key practices like ensuring accessibility and embracing iterative feedback play a crucial role in improving product durability and user satisfaction. Clear roles, contextual commenting, and documenting decision-making processes help retain institutional knowledge, preventing teams from revisiting old problems and keeping collaboration efficient as the team expands.
The strategies in this guide – ranging from defining objectives early to integrating developer insights during prototyping – function as a cohesive system. You don’t have to adopt everything at once. Start small, focus on one area, and build gradually. The secret lies in consistency: make collaboration a core habit, not an afterthought.
At Visual Soldiers, we rely on these practices to deliver user-focused designs that seamlessly transition from concept to production.
Better prototypes lead to better products. Let’s build a workflow that gets your team aligned, faster.
Book a Discovery CallFAQs
When starting, zero in on key interactions and essential user flows that directly test usability and align with the project’s objectives. Focus on features that highlight core functionality to spot potential problems early on. By prototyping the most critical elements first, you ensure the design addresses user needs and supports an iterative, user-focused approach. Kicking off early also opens the door to quick feedback and the chance to explore various directions.
Managing feedback during collaborative prototyping can be a balancing act, but a few strategies can make the process smoother. Start by setting clear, specific goals for what you want to achieve with the feedback. This keeps everyone aligned and ensures input is relevant.
Using a structured feedback process is equally important. Instead of vague comments, encourage team members to provide actionable suggestions tied to the project’s goals. Short feedback cycles also help keep things organized and prevent delays.
Leverage tools that support live commenting and version control. Platforms with real-time collaboration features, like annotations, allow team members to share input directly on the prototype. This keeps feedback focused and prevents the chaos of scattered suggestions, making the process more efficient and manageable.
To make prototypes usable for everyone from the start, incorporate accessibility principles right away. Check color contrast to ensure readability, include alt text for images so screen readers can interpret them, and confirm layouts remain functional when zoomed to 200%. Stick to WCAG standards to ensure your prototypes are perceivable, operable, understandable, and robust. Use tools that offer built-in accessibility features, and test inclusivity with resources like WAVE or Lighthouse. These steps help ensure your prototypes are designed with all users in mind.
Visual Soldiers
Visual Soldiers is an Atlanta-based creative studio specializing in branding, design & digital experiences.
